Laboratory Sandflies: Plebotomus papatasi and Plebotomus dubosci
By Tatum Lyles
CAGE MAINTENANCE
Creation of New Cage

- Unscrew and remove front sock.
- Soak dirty cage with water and break out old plaster with hammer or axe.
- Remove old tape.
- Clean cage with warm water and lab soap.
- Place cage on back and pour in a 1-2″ layer of plaster.
- Allow plaster to dry, but not completely or the second layer of plaster will not properly connect to the first.
- Place cage right-side-up and add a 1-2″ layer of plaster.
- Attach new/clean sock to outside of cage.
- Place new tape around all outer edges, over corners.
Cage Cleaning Procedure
- When cage is empty and not needed for immediate use, place in freezer for 24+ hours.
- Remove cage from freezer and allow to thaw – do not place flies in cage for 48 hours
- Moisten paper towel with deionized water and wipe entire inside of cage. Though it may not seem productive, the action will clear the plexi glass of fly feces and kill any mites that may have entered the cage.
- This freezing procedure should be done to each cage every two months.
LIFESPAN CYCLE
- Day 1 – Blood feed colony and gently return to cage.
- Day 2 – Use aspirator to select blood fed flies 24 hours after blood feeding. Move these flies to a sideways plastic tub where they can excrete the digested blood over the next several days.
- Day 5 – Move flies from tub to plaster pot that has been moistened with deionized water. Be sure there is no standing water at all or the flies will die.
- Day 9 – Release adult flies back into colony and, without touching the plaster bottom of the pot (because it will smash the eggs), vacuum any dead flies out of the pot.
- Day 12 – Flies should begin to hatch. Make sure to start feeding once the first egg
- hatches to prevent starvation. If flies will hatch on a day the lab is closed, feed them before leaving for the weekend or holiday.
- Day May Vary – As the larvae grow, they will eventually pupate. This means they will become inactive and will not feed. It is ok to offer food, but reduce the amount based on how many larvae are still moving around the pot.
- Day May Vary – Once you see pupae in the pot, the flies may emerge. Check pot before opening the lid to offer food.
- Day May Vary – Once flies begin emerging, move the active pot to the emerging incubator. Only open the pot inside of a cage. These pots should still be offered food, as there will most likely still be some larvae.
- Four days after emergence – Once the flies have been released from the pot and have been flying for at least four days, they are ready to blood feed. The cycle then begins again.

DAILY FEEDING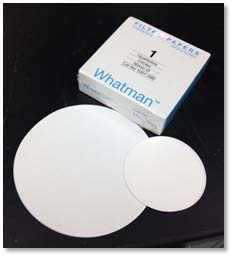
Flies eat sugar water in the wild from plant leaves and flowers. In the lab they eat sugar water created from table sugar and deionized water. Though it can be used for two days, when possible fresh sugar water should be created daily. The flies fare much better when accessing sugar water on a paper circle in a glass lid. Plastic lids seem to cause additional fly deaths.
Recipe: 10g sucrose + 50 ml deionized H2O
BLOOD FEEDING 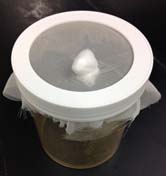
 Blood feeding is routinely done at least one time a week. When colony levels are low, number may increase with twice a week feedings. However, sometimes the excess blood feeding op
portunity is rejected by the flies. They will generally still bite, so it is not known why they reject offered blood from the feeding bell. The blood offered may be old, or unacceptable to the flies. If they are not feeding, changing blood may help alleviate the problem. Sugar water can also be withheld for 24 hours prior to increase desire to feed.
The process is as follows:
- Use aspirator to move flies for blood feeding into plastic feeding container with thin white mesh top. This mesh is thin enough for the sandfly proboscis to penetrate it and the parafilm to reach the blood. Flies are added through a hole in the mesh, filled with cotton.
- Attach blood feeding bell to water warmer and turn on with temperature set between 37 and 40 degrees Celsius.
- Wait at least 3 to 5 minutes for water to warm the bell. Then apply a layer of parafilm to the large opening of the bell.
- Wait at least another 3 to 5 minutes and pour in ½ tube of blood from the refrigerator.
- After another 3 to 5 minutes, place blood feeding bell with parafilm and blood on top of feeding container mesh. Preheating the water, blood and parafilm should prevent the parafilm from sticking to the mesh and causing a leak. However, in case there is a leak, be prepared with paper towels to prevent fly death, as they drown very quickly.
- Once the bell is on top of the feeding container, leave it in place for at least 10 to 15 minutes. If the flies are not feeding, leave it 10 additional minutes and blow gently into the top of the container. Carbon dioxide can instigate the feeding process.
- Release the flies back into their cage with the others. They will be moved to the tub in approximately 24 hours. For additional information, see the lifespan cycle above.
DISPOSAL & PEST PREVENTION
Sandflies in the colonies are not endemic to Louisiana or the United States and care should be taken to prevent them from escaping the lab. Any sand fly debris should be frozen prior to disposal in the trash or down the sink to ensure any eggs, larvae or flies are dead and not capable of living outside the laboratory.
MATERIALS
- Blood Feeding Bell – This bell-shaped glass allows warm water to run through. When parafilmed, the blood and the water do not mix. The water warms the blood to body temperature, enticing the female flies to feed. There are only two usable bells in the lab. If broken, they are difficult and expensive to replace.
- Cage – large box with 3 clear sides for main colonies of flies
- Plaster – purchase from local craft or hardware store
- Pot – small plastic container with plaster bottom and holes filled with plaster that allow moisture to enter
- Sock – material attached to front of cage (must be cut 8” or longer and double layered)
- Tub – plastic container that sits on side, has hole with mesh hot glued on top and sock on end, used day after blooding feeding
